ZIP then activation
Download the ZIP, upload it from Plugins, activate CashFlowCanary and open the plugin screen before any live connection.

Plugin download
A plugin download page built to simplify installation: get the plugin from WordPress.org, verify the ZIP, activate it in WordPress, test demo mode, then connect live monitoring.
The easiest way to install the plugin is to start from this page, then choose the path that matches the user's confidence level: WordPress.org listing, controlled ZIP install, or step-by-step guide.
Open the WordPress.org listing, download the official ZIP and keep this page open while you activate the plugin.
Follow the detailed guide: ZIP upload, activation, demo mode, voluntary live connection and first verifiable checkout check.
Share this page as a short install URL: official source, minimized data, demo mode without an account and checkout proof without PII.
La page française couvre télécharger plugin WooCommerce monitoring, installation ZIP, activation, mode démo et premier contrôle checkout.
Before connecting a WooCommerce store, verify the source, the ZIP install path and the first safe check without customer data.
Use the WordPress.org CashFlowCanary Checkout Monitor for WooCommerce listing instead of a ZIP sent by email or chat.
Download the ZIP, upload it from Plugins, activate CashFlowCanary and open the plugin screen before any live connection.
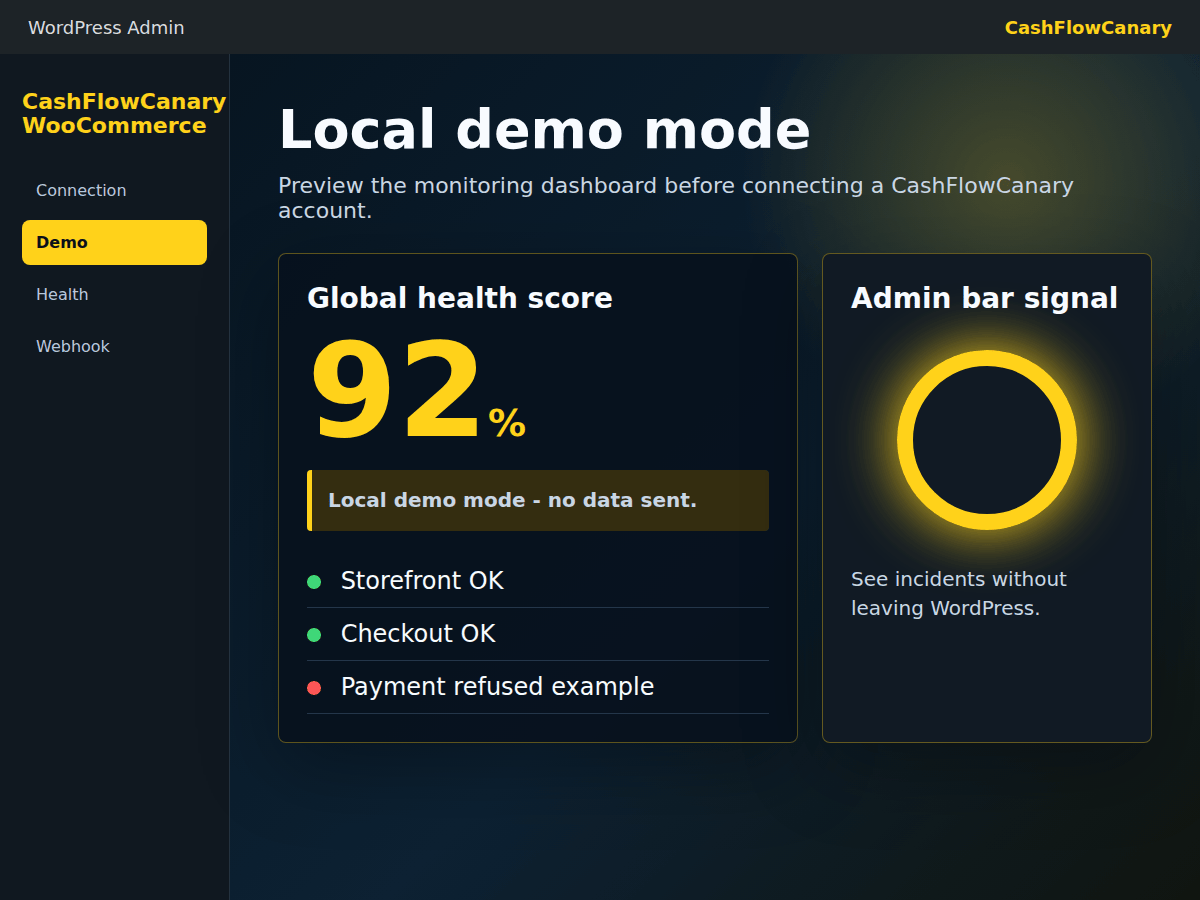
Confirm the screen, statuses and first local signal in demo mode before using a site token.
Going live should stay voluntary: token created in CashFlowCanary, site identified, first expected check and filtered proof.
The flow removes ambiguity: download, upload, activate, verify. Live monitoring remains voluntary and explicit.
Open the official CashFlowCanary Checkout Monitor for WooCommerce listing and download the plugin ZIP.
In WordPress: Plugins -> Add New -> Upload Plugin, then select the downloaded ZIP file.
Activate CashFlowCanary, open the plugin screen and check local demo mode before any service connection.
Create an account, retrieve the site token and connect WooCommerce only when you want to start live monitoring.
Choose the right path immediately: download, follow the guide, check prerequisites or ask for the first checkout signal.
The priority path is WordPress.org: official source, plugin name, installable ZIP and this page kept open during activation.
If the merchant hesitates, the guide repeats the same path with screenshots, WooCommerce prerequisites, WordPress permissions and post-activation checks.
Installation is not finished at the Download click. It is finished when CashFlowCanary shows plugin active, WooCommerce detected and filtered checkout signal.
The same download, installation and first-check path is available in French.
Here is what to check when WordPress rejects the ZIP, the Activate button is missing, or the first CashFlowCanary screen cannot be found.
Check that the file comes from WordPress.org, that you upload the plugin ZIP, and that the WordPress user can install plugins.
Go back to Installed Plugins, find CashFlowCanary Checkout Monitor for WooCommerce, click Activate, then open the CashFlowCanary screen.
The plugin should show a clear state: WooCommerce detected, demo mode available, or action required before any live token is connected.
Do not move to live mode until demo mode, plugin status, WooCommerce status and the first filtered checkout check are readable.
To make installation easier, every step should say what to click, what to verify and which result proves the plugin is ready without exposing customer data.
Starting from WordPress.org avoids suspicious ZIP files: the merchant sees the CashFlowCanary name, plugin format and official download button.
The expected path is Plugins -> Add New -> Upload Plugin -> Install Now -> Activate, with the full guide available if WordPress shows an install error.
Before any live connection, the CashFlowCanary screen should confirm demo mode, WooCommerce state and no unnecessary PII collection.
The real goal is not an installed ZIP: it is a readable, timestamped and filtered checkout signal tied to the voluntarily connected site.
Keep the official source, install steps, pre-live checks and first monitoring signal in one place.
Use the official WordPress.org link, plugin name, ZIP format, Plugins -> Add New -> Upload Plugin path and the full install guide.
After activation, the CashFlowCanary screen should be visible, local demo mode should work and no live token is required to verify the interface.
Keep the checklist short: official source, ZIP upload, activation, demo mode, voluntary connection, first checkout check and filtered proof.
The download path stays connected to checkout monitoring through the same safe install steps.
This download page is the safe bridge from WordPress.org to ZIP upload, activation, demo mode and the first verifiable checkout monitoring signal.
Start from WordPress.org, then keep the install path open until the first checkout monitoring signal is visible.
The path is explicit: download from WordPress.org, upload the ZIP, activate in WordPress, open demo mode, then connect a site token only when ready.
A successful installation should produce a readable signal: plugin active, WooCommerce state, monitored checkout step, next expected check and filtered evidence without PII.
Agencies can send this page when a client asks for a WooCommerce health check plugin, checkout alert plugin or WordPress checkout monitoring plugin download.
First result
Real activation is a WooCommerce site sending a readable plugin signal: health endpoint, checkout status, latest check and next expected check.
The download is paired with a short path: prerequisite, WordPress action, expected proof and fallback link.
Check that you have WordPress administrator access, WooCommerce enabled and permission to install a ZIP plugin.
Keep the path short: WordPress.org -> ZIP -> Plugins -> Add New -> Upload Plugin -> Install Now -> Activate.
Find the CashFlowCanary screen, confirm demo mode and verify the WooCommerce state before connecting live monitoring.
Return to the installation guide: it covers rejected ZIP files, missing WordPress permissions, disabled WooCommerce and no first checkout signal.
No. The plugin exposes aggregate signals for checkout monitoring. Public proof is designed without buyer email, card data or named carts.
Yes. Local demo mode lets you verify the WordPress screen and statuses before connecting CashFlowCanary.
The installation guide covers download, activation, post-install checks and the move from demo mode to live monitoring.
The install is ready when demo mode is visible, WooCommerce is detected and a first filtered checkout signal is readable.